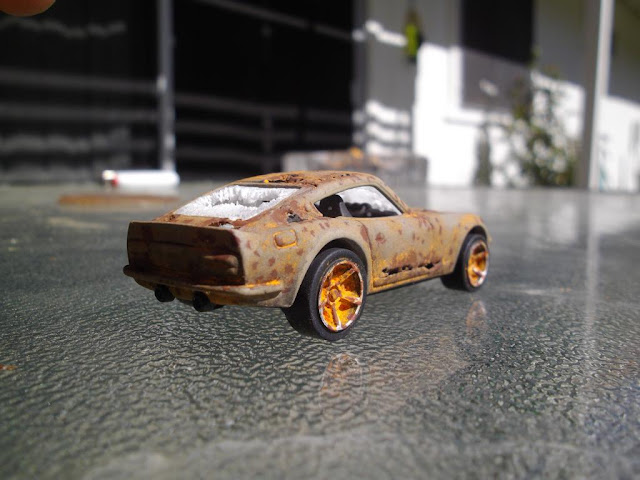
How to Create a Rust-Bucket Custom, by Shawn Sawyer...
It is another weekend full of customs here at Lamley, and we wanted to start with this fantastic "How-To" article submitted to us by customizer Shawn Sawyer. You have probably seen Shawn's work here on Lamley and on HWC many times, including his 2nd-Place entry for the Lamley Custom Contest.
We posted several rusty customs by Shawn awhile back, and quite a few of you asked how he did it. So we asked Shawn and he was nice enough to show us how.
Anyone going to try? If so, we would love to see what you come up with...
(Thanks Shawn.)
Hello all and welcome to my first How-to. I've had more than a few people on here and various other places ask me to show them how I do my "RustLust Kustoms", so I figured I would write up a little how-to to show everyone the steps involved in making a "beater" or "Ruster" or whatever you may call it.
The steps involved can be adjusted to any castings of your preference. These are more or less the basic fundamentals of my technique, as with any custom you are going to have to take a bit of artistic leeway and kinda just go with what you think looks good. When I do these i like to Google a picture of rust on the specific car I am trying to replicate, as well as pictures of rust itself, just to get a basic understanding of what the rust looks like and how its forming. Do you want it heavily rusted with holes? Or maybe just some rust here and there? These are things you have to think about before you just dive right into the project in front of you. So with some ideas in our head let's get down to it...
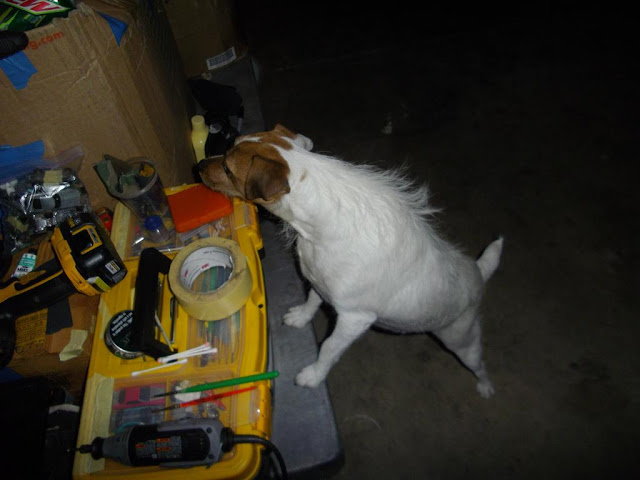
These are some of the tools you will need:
and a helper :):
We start off by drilling apart and stripping the casting (properly label your chemicals please :cool:)
Then we take our dremel with a round grinding bit, and start to thin the metal from the inside out. I like to work in small circles and make them bigger but its up to you on your preference:
In some areas you won't be able to work in a circle and you may have to dig a "trench" with the bit (i.e. lines) to get to certain hard to reach areas, so keep that in mind:
Once you get a "bubble" in the metal, STOP! The metal is very thin at this point. If you want the rusted area larger thin around the bubble, don't worry. If you go through you can always go back in a thin around the hole you made:
After you have made all of your rust areas, it is time to go back and use a thumb tack or dental pick to poke through the metal:
After you poke your holes, go to the inside of the casting a bend some of the metal back out to around where it was unless you want it to look like a war-zone vehicle :laugh:
Think about where your rust is going. Here I have started to put it in a very common place, front and rear of the wheel flares:
While I had it in this stage I went ahead and cut out the headlight areas:
Continue working the back side of the casting until you achieve the amount of degradation your looking for:
Next we take our rust color paint (I like to use rattle can, air brushing will also work):
And give it 2 light coats of paint, inside and out, and allow proper dry/cure time. (dries flat, still a bit wet in the picture):
After it is dry comes one of my favorite parts, the weathering. It is quite simple, for all you will need is water and some basic table salt. Dip the brush in the water, dab the excess water on a rag or towel, and lightly apply the water around the rusted areas:
Next sprinkle salt on the wet areas. It may help to have the casting in a pair of "helping hands" to keep it horizontal, the salt will act as a "mask" for our painting step:
Give it a minute or two to dry then gently tip the casting just enough so the salt slowly falls off to one side:
Repeat this on all areas when you want to simulate rusting:
Next comes paint, and for your first coat you want to hold the can back about 2 feet so the air pressure wont blow off all of your sale. If your using a airbrush be mindful of how much air you give it.
Give the casting two very light dust coats:
After a few hours of dry time brush off the salt. I use a old toothbrush:
The next step is to create a "wash" using water-based acrylic craft paint, or a heavily thinned black enamel:
Looking weathered already:
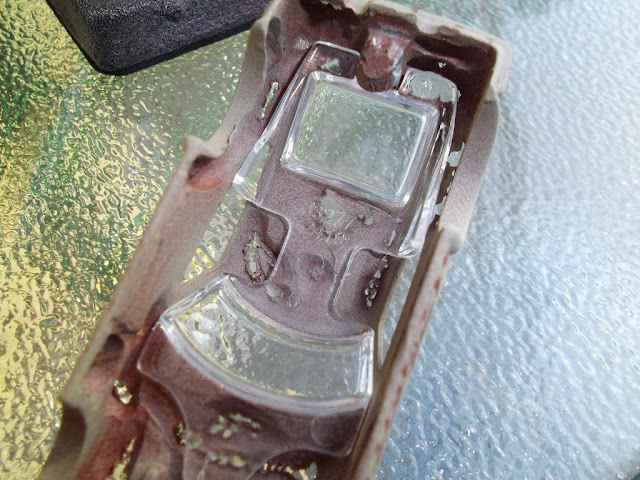
The next step is something people ask me about the most: "How do you do the glass?" Well my friends here's how I do the glass. First, I dip the glass in Pledge with future floor polish:
Let the glass dry at least overnight after applying the floor polish. The reason for the polish is to give the glass that shattered look after it has been scored with the razor knife. Next take your pen and mark the areas that have to be removed, with a sharpie or dry erase pen:
Next drill and cut them out:
Next used your razor blade to make large cuts in the glass like its cracking cutting from the center-out:
Next you are going to use your pen knife you cut from just outside the hole-to inside:
Make a lot of them because this is where the shattered flaky laminate glass look comes from:
After that, you guessed it, it's back to cutting inside out, but this time you are going to do it over the last set of scores you just put down. After everything is cut, go over it with white pastel chalk and brush it into the cracks:
Next we turn to the interior detail. Here I have used 2 layers of brown pastel chalk to create years of dust and dirt:
As with the salt you are going to want to just dust your dullcoate clear on. After you dullcoate the interior it will lose some of its color, so you may have to layer your chalk:
After it dries, go back with your water and salt and add broken glass to you interior:
On the casting you are going to take orange pastel chalk and lightly dab it in the areas around your rust holes, and dullcoate it. You may have to add additional chalk layer to achieve the desired result, the final product should end up a little something like this:
If you have any questions feel free to ask!
-Shawn
Subscribe to:
Post Comments (Atom)


No comments:
Post a Comment